If you have access to a sewing machine that sports a rolling foot, you are just minutes away from turning a piece of cloth into a scarf. But to give the scarf a more finished look, consider adding fringes to the ends.
Fringes are easiest to make if you cut the fabric so that the warp (the vertical threads when the cloth was manufactured) stays long, and the short end of your rectangle follows the weft (the horizontal threads when the cloth was manufactured). This will be the cut edge, if your fabric has come off a bolt. If you have a piece that doesn't have a un-touched edge, pick at the last thread on each of two perpendicular sides. The one that comes apart more easily is the weft, which is also known as the woof.
Cut a rectangle of your desired size. For an adult scarf with enough room to tie or wrap, a good length is about 7 1/2 feet. The width is up to your design preferences, but remember you are going to loose about an inch to the rolling foot seam. If you are cutting your rectangle from a pristine piece, you may want to cut 1/4 inch or so from the un-touched edge, as the threads are tighter where they turn back on each other.
Hem the long sides of the rectangle, using the rolling foot, but leave the length of each end that you want to make into the fringe un-hemmed. To make the fringe, you simply remove the weft threads. The easiest way to do this is to use the back side of a seam ripper to pull up one thread at a time, and tug it gently out of the fabric with your fingers. When you have removed threads up to the line of your rolled hem, you may choose to tie the exposed threads into a series of knotted tassels, or to leave them as an even layer.
Some fabrics just aren't condusive to making fringes (especially thin, slippery or satiny fabrics, or at the other end of the spectrum, fabrics like suede, boiled wool or felted materials that just don't want to come apart). For those, it may be simpler just to finish off the edge, and sew on a fringe made of a different material.
Spring may be around the corner, but it isn't too late to make a decorative scarf for those chilly nights.
6.26.2024
8.20.2013
Cooking From the Garden: Pickled Striped Beets
 Striped beets aren't usually as sweet as regular beets, so they tend to get overlooked when we harvest things from our garden. Jake continues to grow them because he thinks they are pretty, but the result tends to be what I refer to as "monster beets." Sometimes, we will have left them in the ground so long a couple of them grow together into one beet.
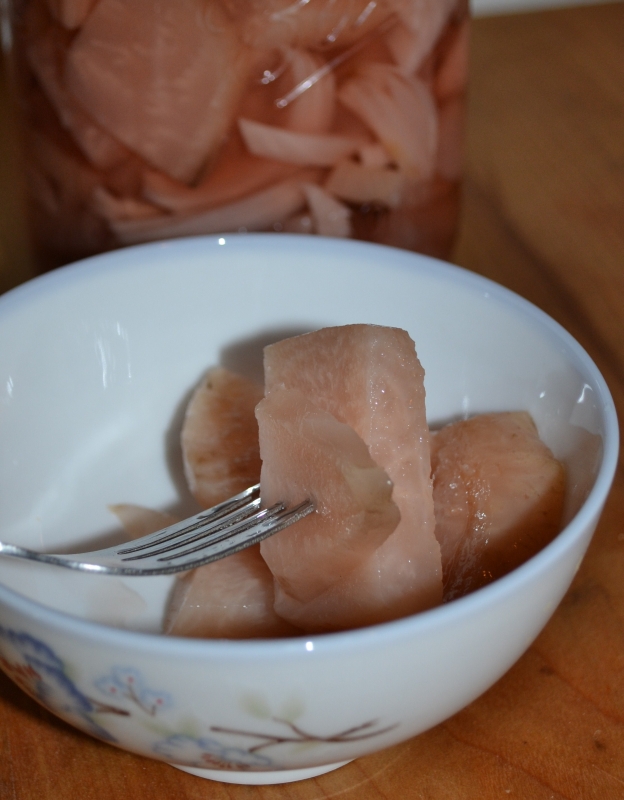
 At that point, they are a little bit tough, and the flavor leaves something to be desired. But it is easy to punch up that flavor by roasting the beets, then pickling them. The stripes present in the raw beets fade over time, leaving a pale pink pickle this goes beautiful in a salad or as an accent to a meal.
We made these earlier in the summer. I've been holding onto these pics until I opened a jar so I could show you the finished product at the same time. You can use the following recipe with red beets, but the color will be much darker.
8 - 10 c. striped beets, cleaned and peeled
3 tbsp. fresh rosemary needles2 tsp. olive oil
1 large red onion, frenched
1 c. white wine vinegar2 tsp. sea salt
1/2 c. sugar
1 c. water
Preheat oven to 400 degrees F. Prepare a canning bath.
Cut the beets into small chunks and place them on a baking sheet. Sprinkle the rosemary over the beets and sprinkle with the olive oil. Roast in the oven for 35 minutes, or until the beets are completely completely cooked through.
In a small pot boil the rest of the ingredients and pour over the beets, leaving proper head space. Process for 30-35 minutes.

7.27.2013
Minions Cake Pops

To make about a dozen pops:
Start with a basic vanilla cake (1 box of cake mix, or a recipe that will make an 11x13 cake). Crumble it and add around 5 tablespoons of vanilla frosting (depending on how moist your cake is). Form the resulting "mush" into egg-shaped balls. I like to put mine in the freezer for about an hour to let them firm up.
 While this is happening, melt:
 1/3 package blue candy melts
1/4 package chocolate chips.
 Roll out:
1 small block blue fondant (cut into 6"x1 1/4" strips)
For each pop you will also need:
4 pieces from a candy necklace (2 white, 2 another color)
2-8 chocolate sprinkles
Black food-color marker
 Dip the stick into the yellow candy, then push it into the cake pop, being careful it doesn't come out the other top. Allow it to set for a minute or two, then dip the pop, tilting to cover all the cake. Before it dries, add the 2 white round candies for goggles and wrap a strip of tootsie roll around it to for the strap (some of the characters can have one eye). Place the sprinkles lengthwise atop the cake pop to make hair. Wrap the strip of blue fondant around the bottom of the pop, pressing it well into the still-wet candy coating to make it stick. Use a toothpick dipped into the melted chocolate chips to add eyes to the center of the candy goggles. Use a toothpick dipped into the blue candy melts to adhere the other two round candies near the bottom of the cake pop to make feet. Ust the food-color marker to draw on a mouth and a circle with a "G" in it.
4.17.2013
It Takes the Cake: Strawberry Filled Chocolate Cake

1 -- I made just enough preserves last spring to last for the year, as strawberry season is right around the corner, and
2-- I need to come up with something special to do with this last bit of sweet perfection.
So I whipped up a rich chocolate cake, substituting lavender sugar for the granulated sugar, along with a batch of chocolate buttercream. When I assembled the cake, I spread a layer of the strawberry lavender preserves in the middle.


Strawberry Lavender Preserves:
8 c. strawberries
4 c. lavender-scented sugar (or granulated sugar)
2 tbsp. lavender flowers
Juice of 1 lemon
Wash and hull strawberries and slice using an egg slicer. Combine the strawberries and the lavender sugar in a large pot and heat slowly until the juices become clear (4-6 minutes). Remove from the heat and stir in lemon juice. Bundle the lavender flowers into a square of cheesecloth and tie securely. Add the bundle to the strawberry mixture. Cover the pot loosely with plastic wrap let stand overnight. When you are ready to proceed, heat 2 or 3 ladles full of the strawberry mixture in a 10-inch nonstick skillet over medium-high heat. Cook and stir for 3 -5 minutes, or until the preserves pass one of the tests for reaching the gel state.
Ladle the jam into the sterilized jars, filling to within 1/4 inch of the rim. Repeat with the remaining strawberry mixture. Process in boiling water canner for 5 minutes.
If you want wore information on canning and are local to the Dallas Fort Worth Area, there is still pelnty of time to sign up for my Fundamentals of Canning class that I will be teaching out at The Universtiy of Texas at Arlington in early June.
4.03.2013
It Takes the Cake: Vintage Cake Presses

There were cookie cutters in there: four Barney ones, to be precise. (As I don't have any toddlers in the house, those will be going up on Ebay, when I get a chance).
But the Wilton things weren't cookie cutters. I wasn't sure what they were, but I had a guess, and when I put in the model number (408-91) on the back into Google, my guess was confirmed. I had picked up an entire set of vintage cake presses.
 Cake presses are neat, and couldn't be simpler to use. Once you have a base coat of frosting on your cake, you gently press the design onto the cake, creating an outline pattern, which you then trace over with thicker decorative frosting. You can use one design in the center of a round cake, four of the same design in the corners of a larger rectangular cake, or a repeating / alternating pattern around the side of a tall cake. Or use your imagination . . .
These can also be used to press a design into fondant, uncooked sugar cookies, royal icing, etc.

Subscribe to:
Posts (Atom)